
|
|
|
|
|
advertisement |
Microsoft Works 4.0 (Win 95) Creating the database Unlike a spreadsheet, you cannot open a new database and begin entering data. You must establish the fields, or data categories, that you want in the database. Step 1 - Launch Microsoft Works and select the Works Tools tab Next, select Database. Step 2 - Name each field that you want in your database. After you enter the field name click on the OK button, even when naming the last field. After going past the last field, click the Done button on the next New Field window. 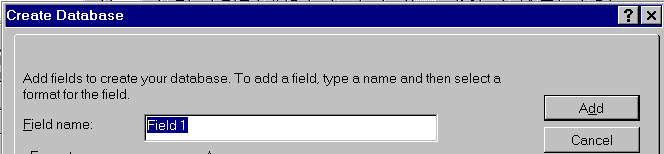 If you make a spelling error on a field, and you have already clicked on the OK button, you can make the correction later. Step 3 - Associate a form with the database. This step will allow the creation of a database design with a more interesting appearance than the rows and columns of cells you might associate with a standard database. 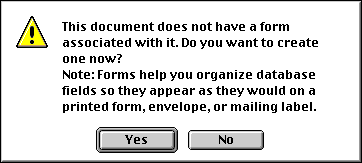 Select Yes to continue. Step 4 - Placing the fields on the database. You may name your database at this point or wait until after you have created the form. Page Size form is the default, and is the one to select for this demonstration. Click on the OK button. 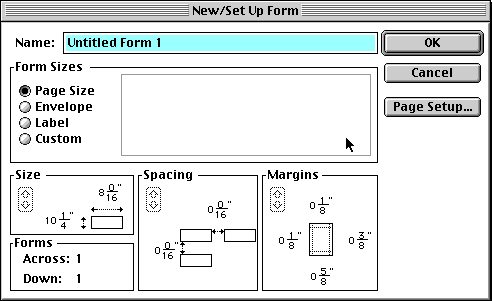 Step 5 - Placing the fields on the form. In the window below, notice the check mark by Show Field Name. The default for this window is deselected. Be sure that you click on the empty box to select Show Field Name. One at a time, click the Insert Field button until all fields are inserted. 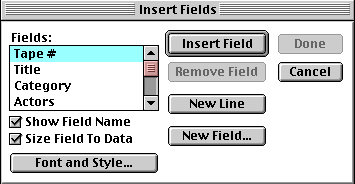 Note! There may be some fields that you would not to insert on the page form. That will be covered later. For your first database, insert all fields. Step 6 - Choose what you want to do next. |

|
Custom Search
|
Visitors since November 2000 |
Memphis, TN |
Return to Internet4Classrooms home