Inserting an image into a slide
Inserting Clip Art
There are a variety of ways to insert Clip Art into a slide:
Included with
slide format
Button in
the toolbar
Menu bar 


Double-Click
Click
Select Picture
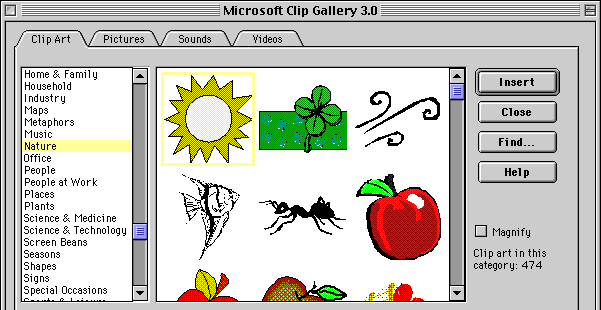
then Clip ArtOnce you have made a selection a database of clip art images will be built.

The image above shows the Nature library and the sun image is selected.
The selected image can be inserted into the slide by double-clicking on the image, or by clicking on the Insert button.
When the image is inserted onto the slide it is surrounded by 8 white blocks:
Moving the image
Place your cursor inside the image and the pointer turns into a four headed arrow.
Click and drag the image anywhere on the slide you want to with this cursor.
Resizing the image
Place your cursor on one of the corner squares and it changes to
a two headed arrow pointing diagonally. If you click and drag away from the center of the image on any one of these 4 corner squares the image gets larger in both width and height. If the Shift key is depressed while you are dragging the image will not become distorted.
If the cursor is placed on one of the center squares it changes to
a two headed arrow. If you click and drag the image will change size in one direction only, width or height.
Inserting an image other than clip art
Select the Insert menu from the top of the screen. Move the cursor down to Picture , and then over to From File.
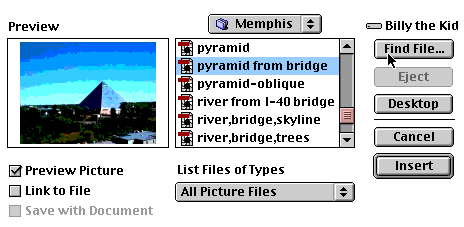
PowerPoint displays the following window:
In the above window I selected a file of images called Memphis. A thumbnail of the selected image is displayed. Just as with Clip Art, the picture can be inserted by double-clicking or by clicking on the Insert button.
If the Find File button is selected, Power Point will build a database of all images stored on your computer
Go to Using different slide views
Go Back to Using PowerPoint for presentations

Use of this Web site constitutes acceptance of our Terms of Service and Privacy Policy.