Links for K-12 Teachers | Assessment Assistance | On-Line Practice Modules | Daily Dose of the Web
 You can share
your printers through your network by following these simple steps.
You can share
your printers through your network by following these simple steps.
Step One:
First make sure your machine is set up for File and Print Sharing. Secondly, check to see if the printer you wish to use is set up for sharing also. If not, follow these directions.1. Right click the printer to be shared.
2. Select Sharing on the menu
3. Name the Printer to be shared.
4. Click OK. A hand should appear under your printer.
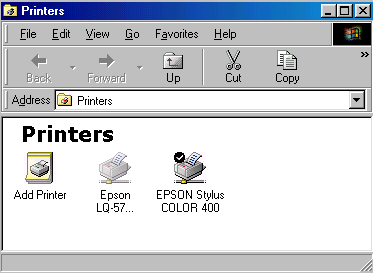
Step Two:
Open your Printer Folder. Start/Settings/Printers.Select Add Printer.
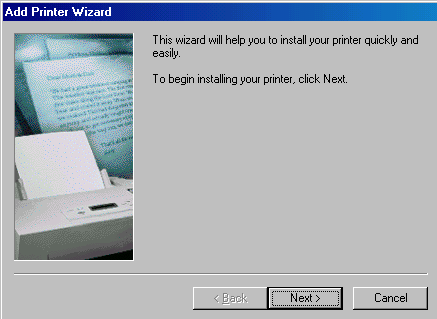
Step Three:
An Add Printer Wizard dialog box will appear, click on Next at the bottom.
Step Four:
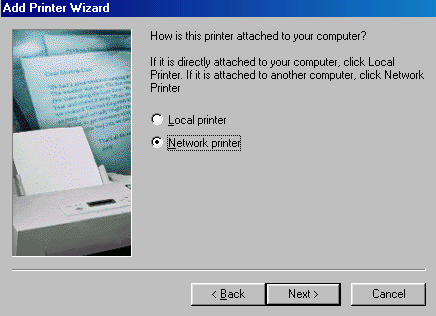
Step Five:
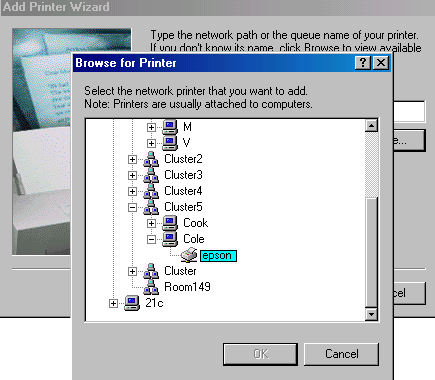
The box will ask you for the path to the printer. Select browse. Your network neighborhood will open.
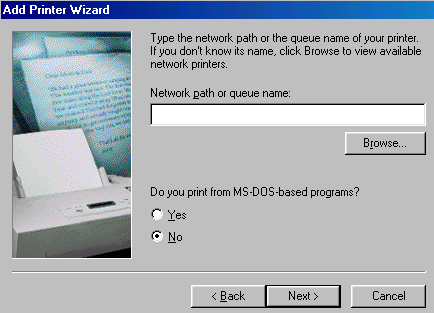
Find the name of the computer to which the printer is hooked up. Click on the name of the computer. Then click on the the printer name to highlight it . Click OK and Next
Step Six:
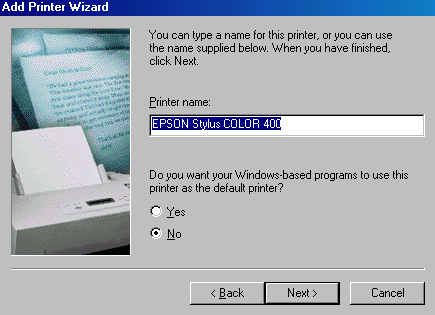
You can name the printer on this dialog box. Usually, the printer brand and room number is sufficient. The box will ask you if you want to print from a DOS program. The default is No. Click on Next at the bottom of the box.
Step Seven:
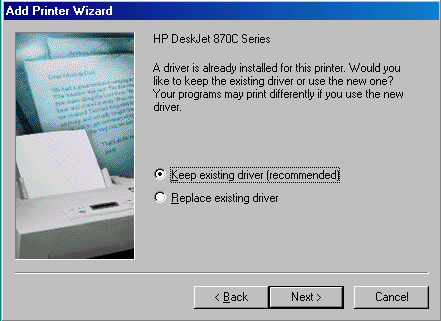
If you have already installed the printer before, it will ask if you want to keep the same drivers. If your machine is having problems printing from this printer, which is why you are reinstalling, then select Replace existing driver. Otherwise, you can select Keep existing driver.
Step Eight:
The dialog box asks if you wish to print a test page. Select Yes, and Finish.

Step Nine:
Another box will come up and ask if the page successfully printed. If so, select yes.You will see your new printer in your Printer Folder with a line underneath it indicating that this is a network printer.
Return to the Network Coordinator's
Workroom
Contributed to the Coordinator's Workroom by Susan
Brooks

Custom Search
|
Visitors since November 2000 |