
|
|
|
|
Using Images
|
Images |
|
Using Images |
|
|
Changing the size of an image |
|
|
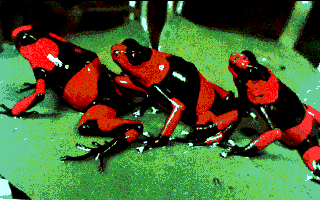
I found this great picture of frogs which live in a tropical rain forest. However, the picture is larger than I want it to be on my page. There are two ways to make this change. Click on the image. When the image is selected blocks appear in the bottom right corner of the image and the bottom and right edge. Hold down the shift key. Click on the bottom corner block and drag the image smaller. Holding down the shift key while you drag prevents distorting the image. |
|
|
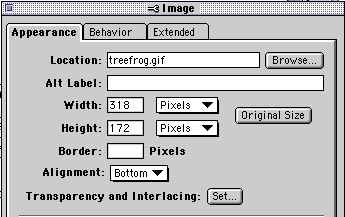
Reduce the width and height of the image by the same proportional amount. For example, cut each number in half giving an image size of 160 pixels by 100 pixels. The image below is 160x100. Alt Label - Enter a short summary of what the picture is. As the picture is downloading this title will be displayed. Border - If you make an image a link, the image will be surrounded by a border. If you do not want the border to be displayed, enter a border size of 0 (zero). |
 |
|
|
|
Making an image transparent |
- Select the image and click on the object editor.
- Click on the Set button to the right of Transparency and Interlace. This opens another window, displaying the image.
- Move your cursor into the image, and it turns into an eyedropper.
- Move the eyedropper cursor into the background area of the image.
- A click of the mouse will cause the eyedropper to suck in the background white color. This will allow the background color of your web page to be displayed behind the picture without the distracting white block around it.
- Close the window with the image in it and you will be prompted to save the changes.
- Select Save and the background will show through the former white portion of the image.
Caution! This technique will not work on a jpeg image or an animated gif.
|
|
Making an image act as a link |
|
|
Click on the image to highlight it. Click on the Image editor and paste the URL which the image will serve as a link to. |
|
|
Now it is a time for you to make a judgment call. I personally do not like the blue block which surrounds the image. However, if you remove the block, the only way that someone will know the image is a link is to move the cursor over the image. |
||
|
The image window above immediately under the Alt Label block you will find a Border block. If you want to make the border disappear enter 0 (zero). The image to the left is also a link. You can verify that by moving the cursor over the image. |
||
|
|
Making part of an image act as a link |
|
I am going to make several parts of the image above act as links to web sites. In order to do this I will instruct the image to act as an Image Map. To do that select the image and then click on the object editor. You may also double-click on the image to bring up the window. |
|
|
|
Select the Behavior tab. Select Image Map and then click on the Edit button. You will have the choice to select rectangular areas or circular areas to act as links. |
|
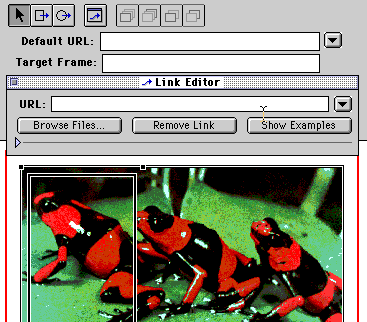
I selected the rectangle tool and drew a rectangle around the first frog on the left. The Link Editor window popped up ready for the URL to be entered. After entering one rain forest site I drew rectangles around the middle frog and then the frog on the right. Each time the Link editor window opens ready for the URL. Place your cursor over each of the frogs. If you will look at the bottom of the Netscape screen you will see that each frog is a link to a different site. |
|
|
|
Some possible uses of the Image Map include making each student in a class picture act as a link to a page displaying that student's work, or making faculty pictures act as Email links. |
|
|
Finding out how the images will affect download time for your page |

Custom Search
|
Visitors since November 2000 |
Memphis, TN |
Return to Internet4Classrooms home


