| Sign Up For Our Newsletter |
| Sign Up For Our Newsletter |

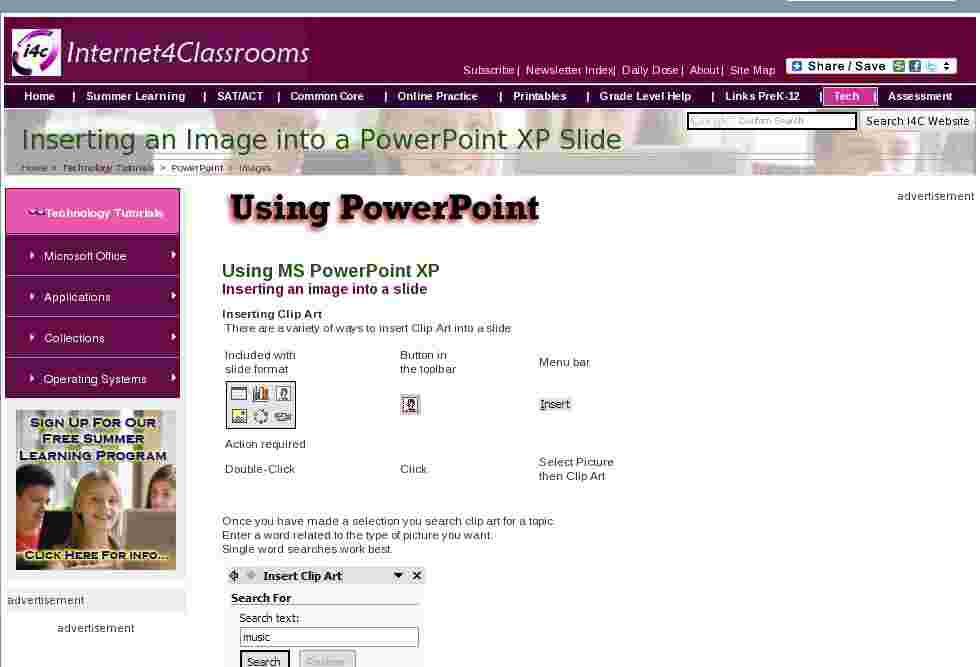
Using MS PowerPoint XP
Inserting an image into a slide
Inserting Clip Art
There are a variety of ways to insert Clip Art into a slide:
Included with
slide formatButton in
the toolbarMenu bar 


Action required Double-Click Click Select Picture
then Clip Art
Once you have made a selection you search clip art for a topic.
Enter a word related to the type of picture you want.
Single word searches work best.
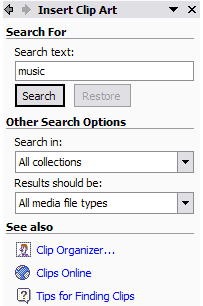
If you find that most images in your search inform you that the clip art is stored on a CD, check with the technology department of your school or district. Someone needs to do a second installation to install clip art on your computer. The basic installation most commonly performed places only a small amount of clip art on your computer. In the search results window below, two options are circled.
- Click on the icon with the left pointing arrow to expand the search results window
- Click on the word Modify to change the search topic.
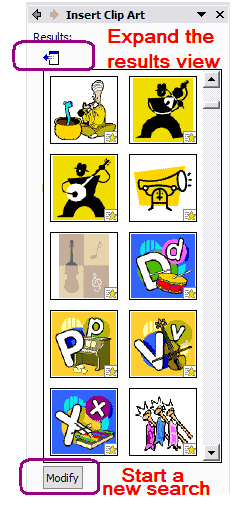
Expanding the clip art search results list allows you to scan through a larger selection of image without scrolling.
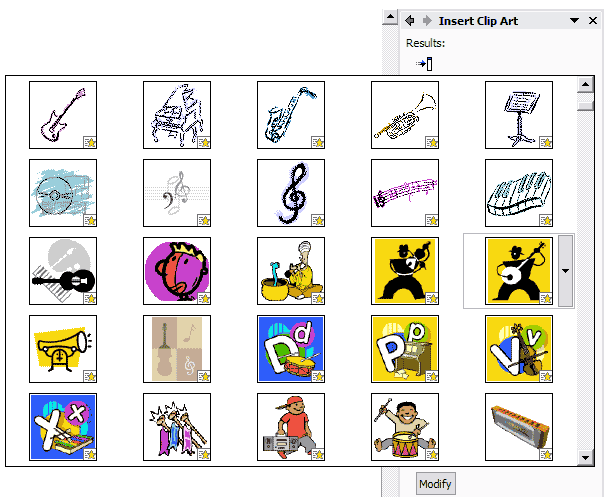
To insert an image onto your PowerPoint slide, click one time on the image. You may continue to add images from the same search results window, or modify your search and look for other images. Below is an image inserted from the search results page.

Moving the image
Place your cursor inside the image and the pointer turns into a four headed arrow.
Click and drag the image anywhere on the slide you want to when the cursor is shaped like this.
Resizing the image
Place your cursor on one of the corner circles and the cursor changes to a two headed arrow pointing diagonally
. If you click and drag away from the center of the image on any one of these 4 corner squares the image gets larger in both width and height.
If the cursor is placed on one of the center circles the cursor changes to a two headed arrow
. If you click and drag the image will change size in one direction only, width or height. Avoid changing only the width or height of an image, it will look distorted.
If your cursor is placed over the green circle at the top of the image the cursor changes to a circle with an arrow pointing clockwise. Click and drag the green circle to change the orientation of the picture.
Inserting an image other than clip art
Select the Insert menu from the top of the screen. Move the cursor down to Picture , and then over to From File . Navigate to find the sub-directory containing images. As an example, see the image below:
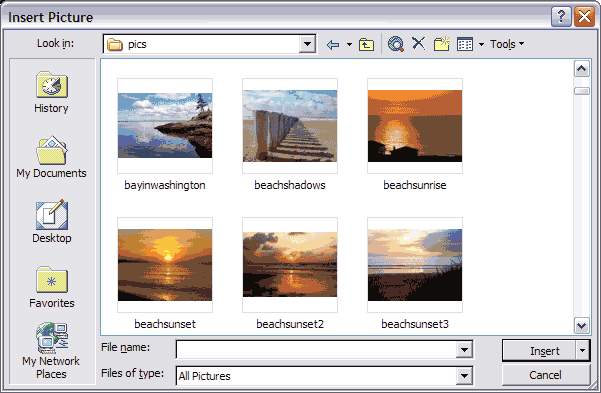
In the above window I selected a file of images called pics . A thumbnail of available images is displayed. As with Clip Art, the picture can be inserted by double-clicking or by clicking on the Insert button.
Go to Using different slide views
Go Back to Using PowerPoint for presentations

Internet4classrooms is a collaborative effort by
Susan Brooks and Bill Byles.

advertisement
advertisement
Use of this Web site constitutes acceptance of our Terms of Service and Privacy Policy.
