| Sign Up For Our Newsletter |
| Sign Up For Our Newsletter |

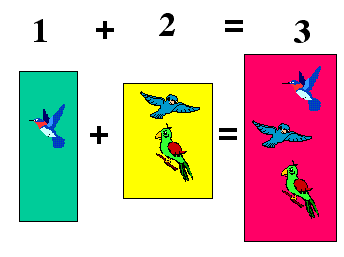
Drawing a rectangle and changing the Fill Color
The Rectangle tool was used to draw the three colored boxes you see above
Step 1 - In the Drawing Toolbar, click on the Rectangle tool

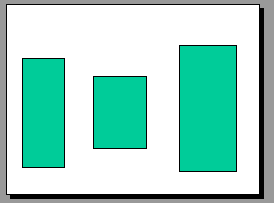
Step 2 - Next you will click and drag to draw three rectangles. If you have not done this before you should put your cursor near the top left corner of where you want the rectangle to be and hold your mouse button down as you drag the cursor to the bottom right corner of where the rectangle should be. When you let go of the mouse the fill color will be placed in the box.
Step 3 - Repeat this process for the two other boxes you see in the slide above. Remember to leave room for the plus (+) and equal (=) signs. You should then have three boxes, and they will all be the same color. Note: you must click on the Rectangle tool each time you want to draw another box.
Step 4 - Click on the center box to highlight it.
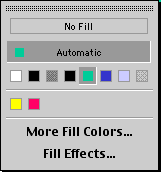
Step 5 - In the Drawing Toolbar click on the down arrow beside the Fill Color paint bucket ,and choose a new color for the box.

Step 6 - Repeat that Procedure for the box on the right. If you do not like any of the automatic fill colors suggested, select More Fill Colors .
Go to the next lesson - Inserting and resizing Clip Art

Internet4classrooms is a collaborative effort by
Susan Brooks and Bill Byles.

advertisement
advertisement
Use of this Web site constitutes acceptance of our Terms of Service and Privacy Policy.