| Sign Up For Our Newsletter |
| Sign Up For Our Newsletter |

Animating screen elements


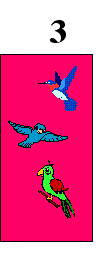
Now it is time to animate the slide, to bring elements onto the screen one at a time. In the slide above there are five elements. In the last lesson you grouped the original sixteen elements into the five you see above. Each slice will be brought onto the screen one at a time. This lesson shows how to animate the same slide that has been used as an example throughout this series. The exact same procedure will be used on the other five slides in your presentation.
Step 1 - Select a slide and go to the full slide view. If you are in the slide sorter view, double-click the slide. I am using slide 2
Step 2 - From the Slide Show menu, select Custom Animation
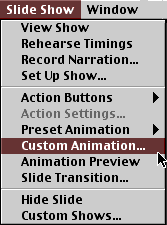
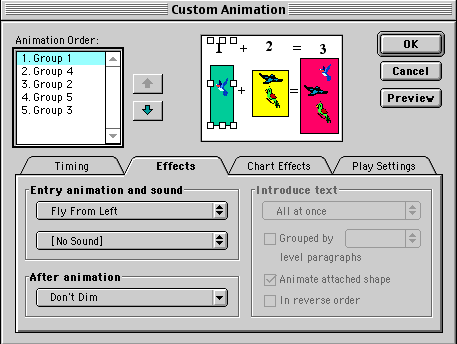
Step 3 - When you select Custom Animation, the following window opens:
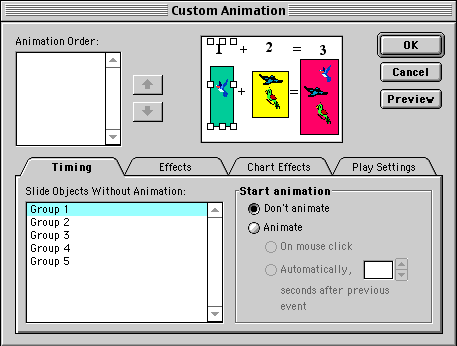
Step 4 - One at a time, click on the group name to select it, click in the circle by Animate, and then leave the dot in the circle by mouse click. When you select a group, that group will be highlighted in the preview window. Continue until all 5 groups are selected.
Contrary to my expectation, group 2 is not the two plus symbols, it is the yellow block. You want the elements to animate with the leftmost element first progressing to the rightmost element last. If you have them animating in the wrong order that can be corrected.
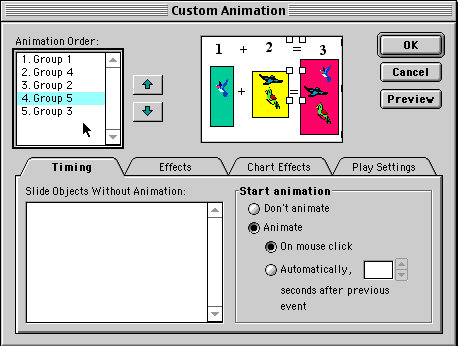
Step 5 - In the window below notice that all five groups have been moved from the Slide Objects Without Animation box up into the Animation Order box. Also notice the up and down arrows to the right of the Animation Order window. If an element is not in the right order, use the arrows to move the group up or down in the order. When the order is correct click on Effects .
Step 6 - One at a time, click on each group and select an effect, and a sound to go with the effect if you wish to. Notice there are up and down arrows on the effect and the sound strip. That means you can find a menu of choices by clicking on those strips. Choose the preview button at any time to see how the effect would work. Use a variety of effects instead of the same effect on each slide. In planning your effects remember the Run Over rule. ( Run Over rule - Avoid choosing an effect that will bring a group onto the slide by passing over a group that is already on the slide. )
Step 7 - Continue this process until all five groups on this slide are animated.
Step 8 - One at a time, animate the other four slides in this presentation.
Step 9 - Save your slide show.
Ready? Take your slide show into the classroom and teach with it.
What's next? Find another skill you want to teach and build a show.
Want to try spelling?

Internet4classrooms is a collaborative effort by
Susan Brooks and Bill Byles.

advertisement
advertisement
Use of this Web site constitutes acceptance of our Terms of Service and Privacy Policy.
